MR2
MK1 Clear Rear Indicators
Okay, so you’ve fitted clear lenses to the front and side repeaters, that only leaves the back This is how I did my rear lenses, as far as I know the first time these type lenses have been done.
Credit must go to to EricS http://www.padandwheels.com/mr2/index.htm whose site gave me the idea and loads of info.
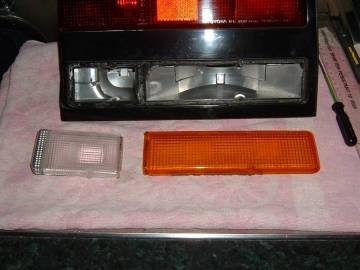
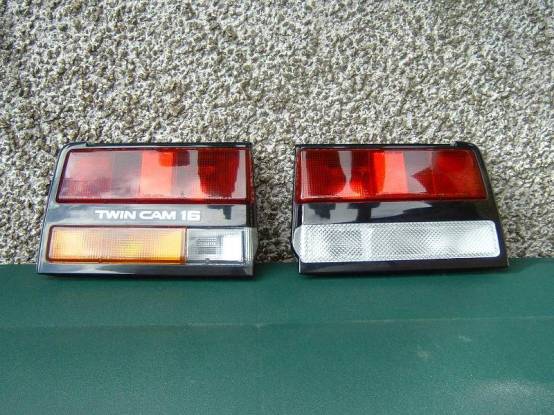
This is what the UK standard lenses look like

What you’ll need:
- Clear fluorescent light diffuser panel. You need to find the right kind that will cut without shattering and will bend with heat. I used diamond-cut pattern.
- A spare set of rear light clusters (not strictly needed, but a very good idea in case of disasters)
- Philips head screwdriver, to disassemble light cluster
- A heat gun.
- Plastikote or Duplicolor Chrome paint.
- Ruler.
- Straightedge.
- Sharp utility knife
- Silicone-based bath/tub/tile sealer (clear).
- Dremel tool with cutting disk (or other appropriate cutting implement).
- Jigsaw
- A damp cloth
1) Okay, assuming you know how to take the rear boot inside panel out, remove the light holder assembly, you simply need to remove the nuts holding the light assembly in place. You will probably find it necessary to remove the air ducting in the ‘87+ to do so.
2) On the back of the light remove the 6 screws that secure the indicator and reversing light lenses
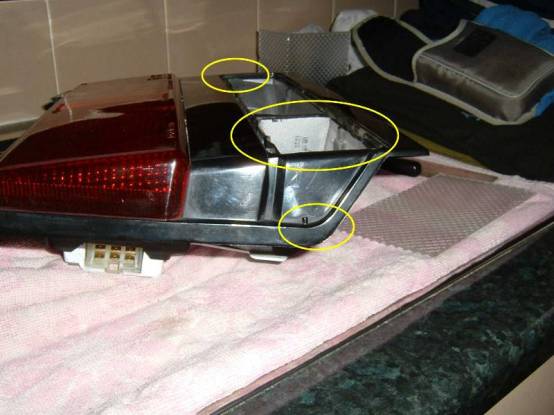
3) Use the heat gun, moving it slowly around the lens to loosen the glue, also heat the back of the light holder, keep the heatgun moving as it’s quite easy to burn/melt the housing. It will take some time and patience to get then old lens off, pry up on the yellow lens to remove it. The best way is to keep steady pressure on it. If you break the lens, who cares…but be careful not to mark the housing. Start with the indicator lens and work towards rev light lens, there’s little tabs interlocking them. Then carry on to remove the rev light lens. When you’re finished it should look like this.
4) Once you cleaned up the excess glue you will need to cut down a couple of bits to allow the diffuser material to sit into the small lip that runs around the edge of the housing .Its pretty obvious what you need to cut. I used a combination of Dremel and Stanley knife. The little bump in the bottom circle needs removed.
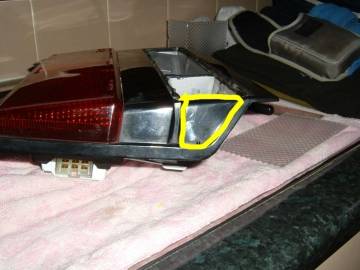
5) Clean up everything and mask off the rest of the light prior to spraying with the chrome paint I also sprayed the side of the light housing marked below, which will be behind the new lens. The original lens had some silver foil here.
6) I made up a template from stiff card to get the shape for the new lens then used that to mark out the diffuser. Cut out the diffuser with a jigsaw – slowly. Then trial fit the material to the housing using aluminium oxide paper pinned to a board to remove any excess and get the edges straight. You won’t get a dead straight cut with a jigsaw. Depending on the type of material you may need to bevel the inside edge of the material to allow it to sit flush into the recess. Take your time!!!! It will be repaid in the quality of the finished light. When your happy with the fit, its time for the difficult bit.
7) Secure the new lens in place with masking tape along the long edge. Use the heat gun to heat the diffuser where it will bend round the housing, keep the gun moving continuously. Keep trying to bend the material round the housing, once its hot enough it will go quite easily. Use the damp cloth to smooth off the curve and hold it in place until it cools down. I recommend practising on an off cut first. Recheck the fit and adjust as necessary. Use the silicon to secure the new lens in place. Use masking tape to keep it in place until the silicon cures. It should now look something like this
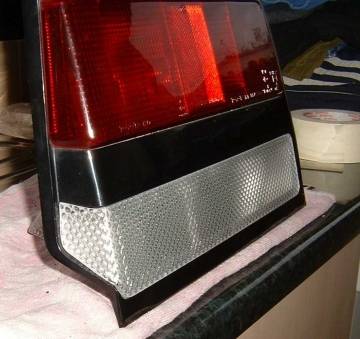
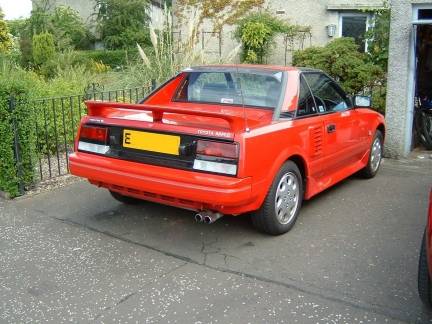
8) I polished the light cluster up with some T-cut & then wax before fitting to the car Remember to fit Amber bulbs in place of the clear ones!!
Take your time, trial fit often and you will end up with a pretty unique look to your MK1
GOOD LUCK.
If anyone wants a copy of the template contact me on the MR2OC forum.
Jimi Lawson